


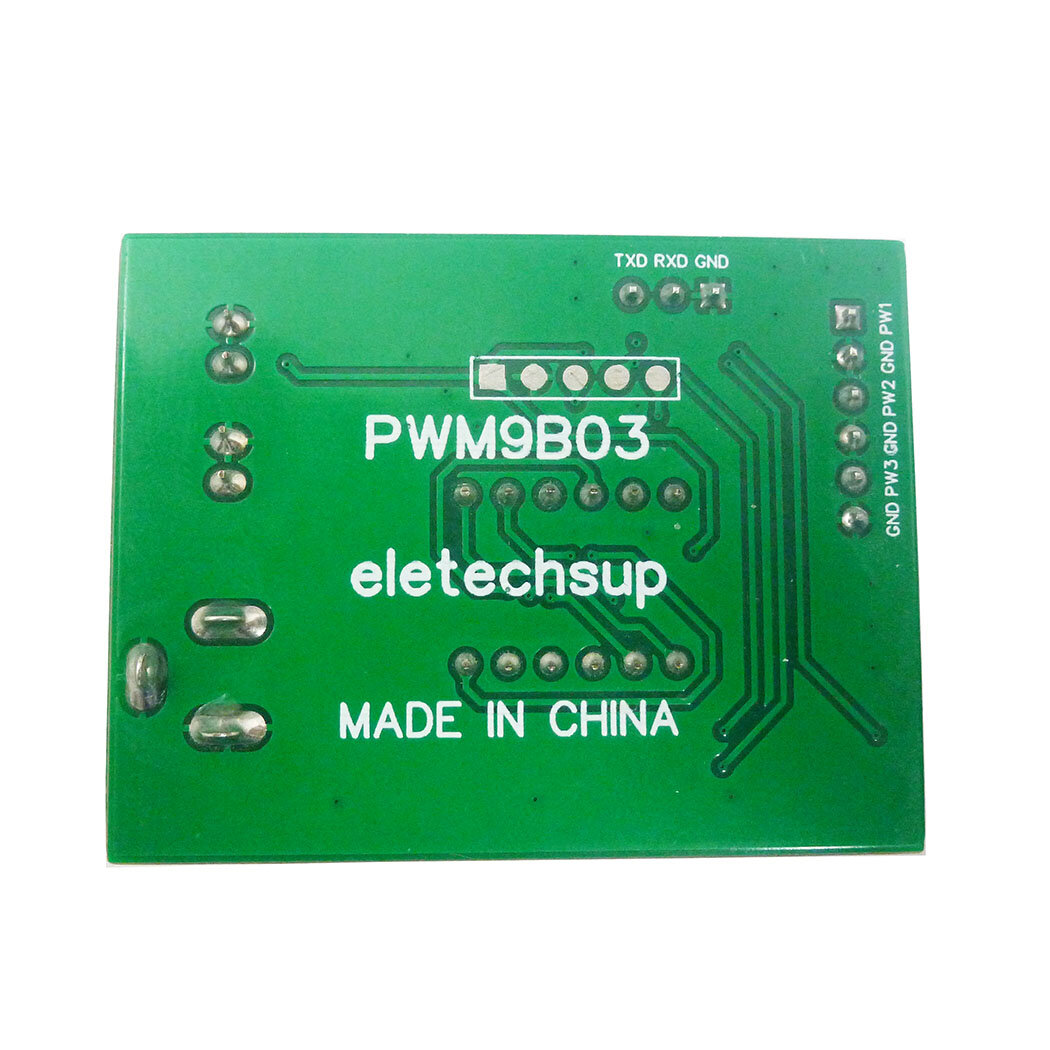
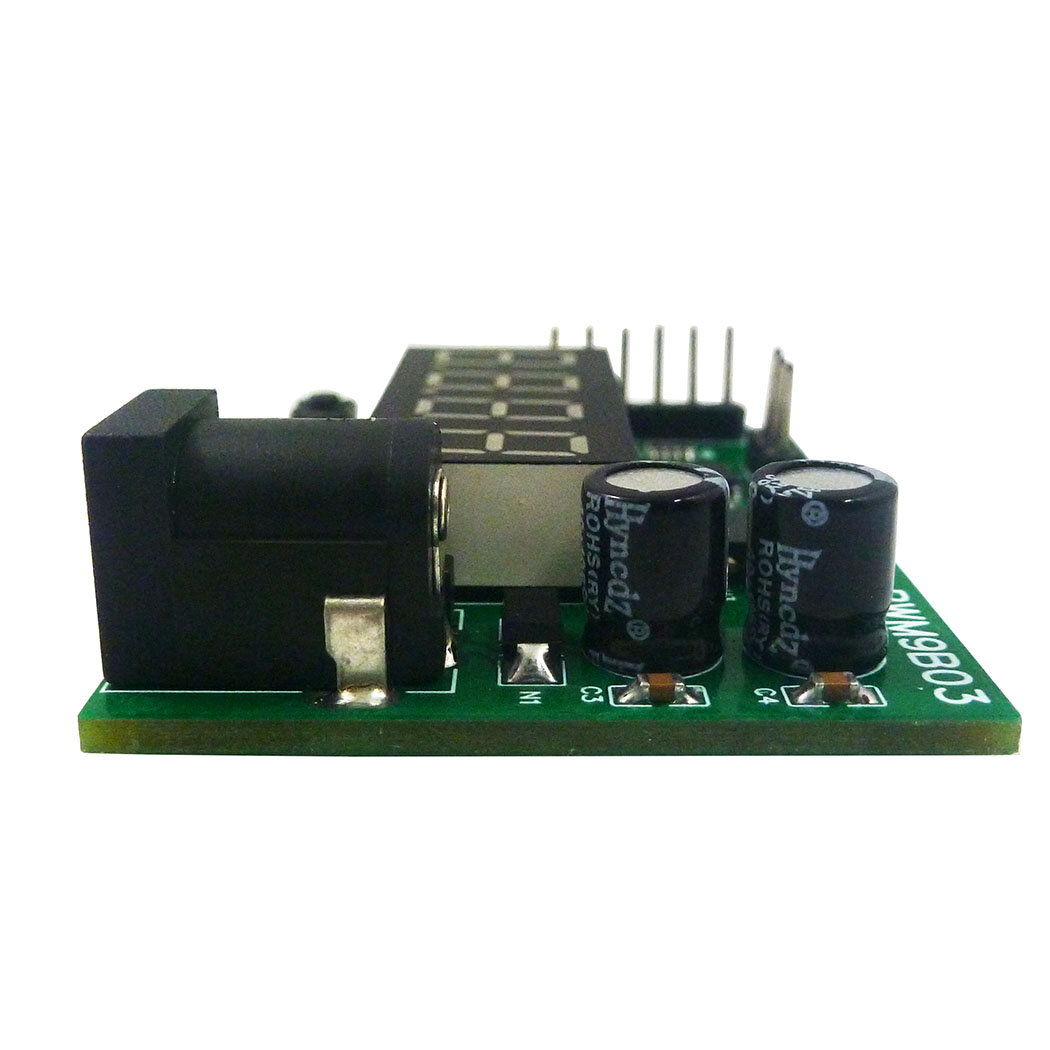

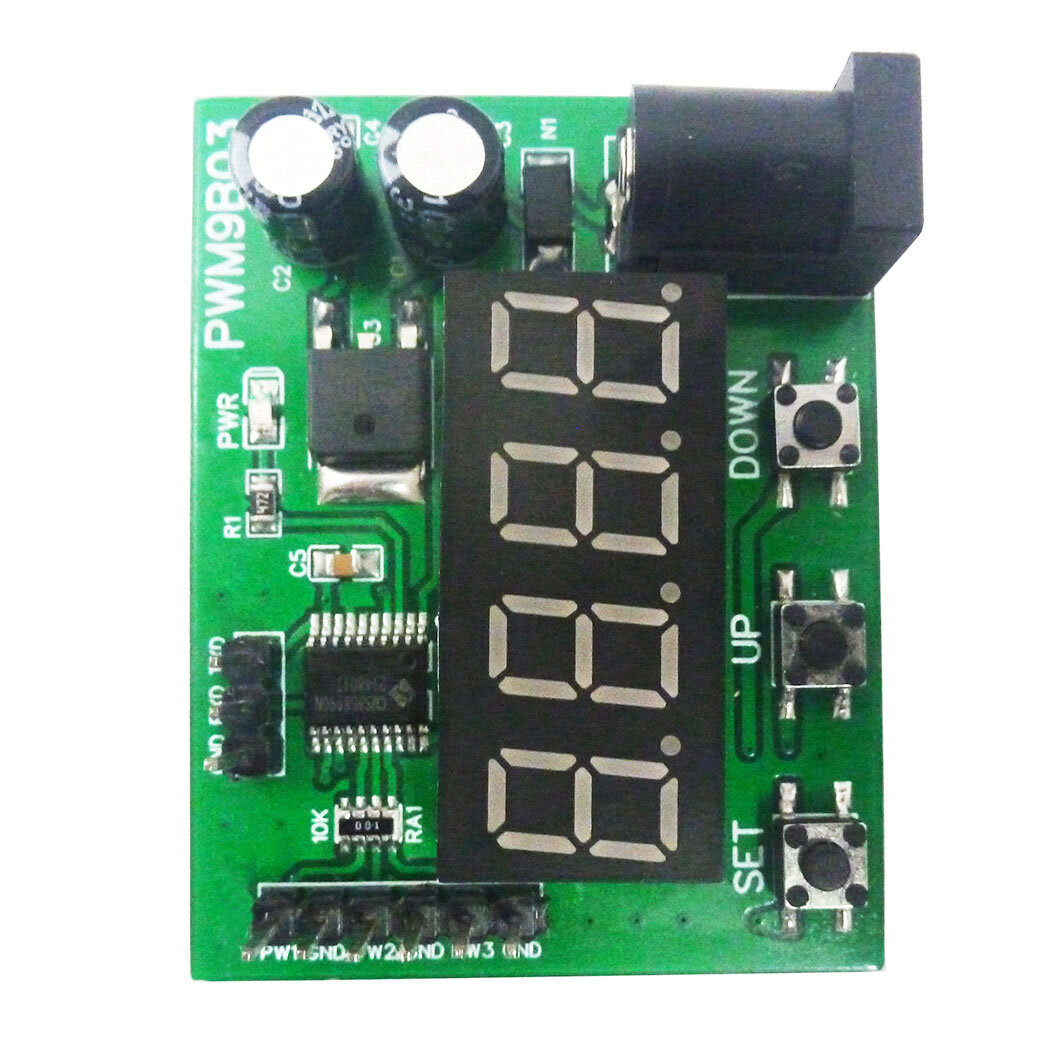
PWM9B03 3-Channel PWM Pulse Signal Generator Module

 Direct purchase from the factory
Kev them nyiaj ruaj ntseg

 Tsoom dawb
 Kev soj ntsuam
 Kev rov qab
Tsoom dawb
Zoo siab txais tos rau Roymall, koj lub professional website yuav premium department store tsoom. Peb ntsuas thiab txaus siab rau koj kev pab, thiab peb xav qhia peb lub siab ua tsaug los ntawm ntxiv qhov zoo nkauj rau koj cov kev yuav khoom. Thaum koj yuav khoom nrog peb, koj tsis tas yuav tau cov khoom zoo thiab ua kom koj lub neej zoo dua, tab sis koj yuav tau txais ib qho tsoom dawb nrog txhua qhov kev yuav khoom. Npaj los nrhiav peb cov khoom thiab nrhiav koj cov tsoom zoo? Nrhiav peb cov khoom xaiv, sau koj qhov kev yuav khoom, thiab nqa koj lub siab rau kev zoo siab thaum koj cov tsoom dawb tuaj nrog koj cov khoom.Kev soj ntsuam
Peb yuav ua haujlwm hard kom soj ntsuam cov khoom rau koj tom qab tau txais koj cov kev yuav khoom thiab ua kom lawv mus kom zoo. Cov lus qhia soj ntsuam yuav muab rau koj hauv koj daim email confirmation.Hauv feem ntau, cov kev yuav khoom yuav raug kho hauv 2 hnub.Hauv cov xwm txheej tshwj xeeb, nws yuav raug delay raws li no: Thaum koj sau ib qhov kev yuav khoom hnub Saturday, Sunday lossis hnub so, nws yuav raug delay 2 hnub..Feem ntau, nws yuav tsum 5-7 hnub ua haujlwm (Monday mus Friday) tsis raug cuam tshuam los ntawm kev delay lossis lwm yam environmental factors..Vim peb cov kev soj ntsuam yog worldwide yog li cov sij hawm soj ntsuam yuav sib raug rau koj qhov chaw uas yog li nws yuav tsum tau ob peb zaug thiab thov ua siab ntev yog koj nyob hauv zej zog lossis lub teb chaws.1. Kev rov qab & hloov chaw
Peb tsuas yog txais cov khoom yuav los ntawm roymall.com. Yog tias koj yuav los ntawm peb cov khoom lag luam lossis lwm cov khoom yuav, koj tsis tuaj yeem rov qab lawv rau peb. Cov khoom kawg lossis cov tsoom dawb tsis txais tos rau kev rov qab. Kom muaj peev xwm rov qab, koj cov khoom yuav tsis tau siv thiab nyob rau hauv tib yam li koj tau txais lawv. Nws yuav tsum nyob rau hauv cov pob txha original.Tom qab tau txais cov lus qhia rov qab los ntawm peb, thov pob txha koj cov khoom rov qab thiab coj koj cov pob txha mus rau lub chaw hauv pob lossis lwm tus neeg soj ntsuam.Peb yuav kho koj cov khoom rov qab lossis hloov chaw hauv 3-5 hnub ua haujlwm tom qab peb tau txais nws. Kev them rov qab yuav raug kho thiab automatically them rau koj qhov kev them nyiaj ua ntej.Tsis muaj kev rov qab lossis hloov chaw yuav raug txais yog tias cov khoom yog tsim custom, suav nrog custom ntev, custom color, lossis custom sau ntawv.Xav tau ntau ntxiv pab, thov hu rau peb. service@roymall.com lossis Whatsapp: +8619359849471
2.Kev them rov qab
Koj yuav tau txais tag nrho cov nyiaj rov qab lossis 100% store credit tom qab peb tau txais koj cov khoom rov qab thiab tshawb xyuas nws. Kev them rov qab yuav raug kho thiab automatically them rau koj qhov kev them nyiaj ua ntej. Thov nco ntsoov tias cov nyiaj soj ntsuam thiab cov nyiaj fees tsis yog rov qab. Cov nyiaj soj ntsuam ntxiv tsis yog rov qab thaum cov pob txha tau soj ntsuam lawm. Koj yog tus neeg ua haujlwm rau kev them cov fees no thiab peb tsis tuaj yeem tso tseg lossis rov qab lawv, txawm tias koj cov kev yuav khoom rov qab rau peb.Thaum peb tau txais thiab paub tseeb tias koj cov khoom rov qab, peb yuav xa koj ib daim email kom paub tias peb tau txais koj cov khoom rov qab. Peb yuav qhia koj txog kev txais lossis tsis txais koj cov nyiaj rov qab.Yog tias koj muaj teeb meem nrog kev them rov qab, thov hu rau peb. service@roymall.com lossis Whatsapp: +86193598494711 Working voltage: DC 6-24V
2 Working current: DC 12-30MA
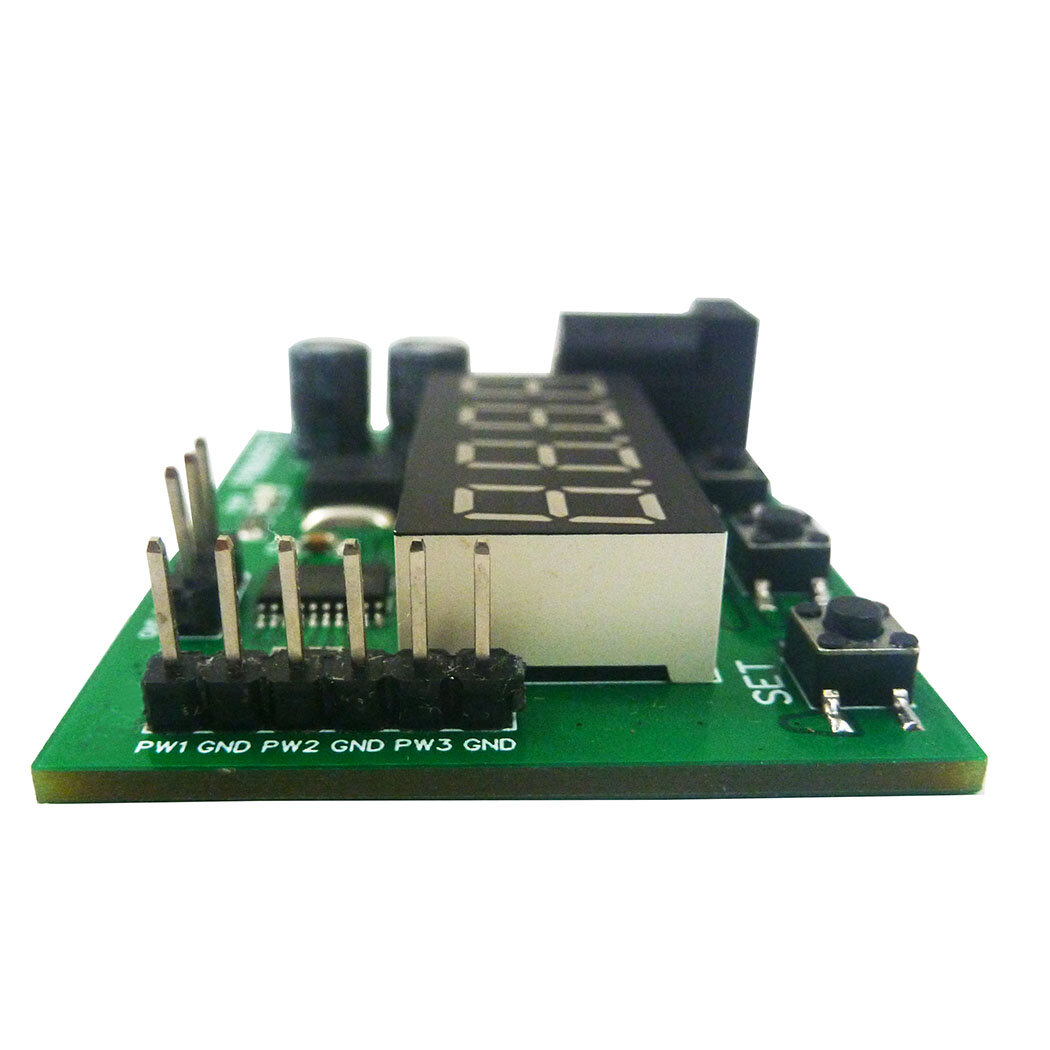
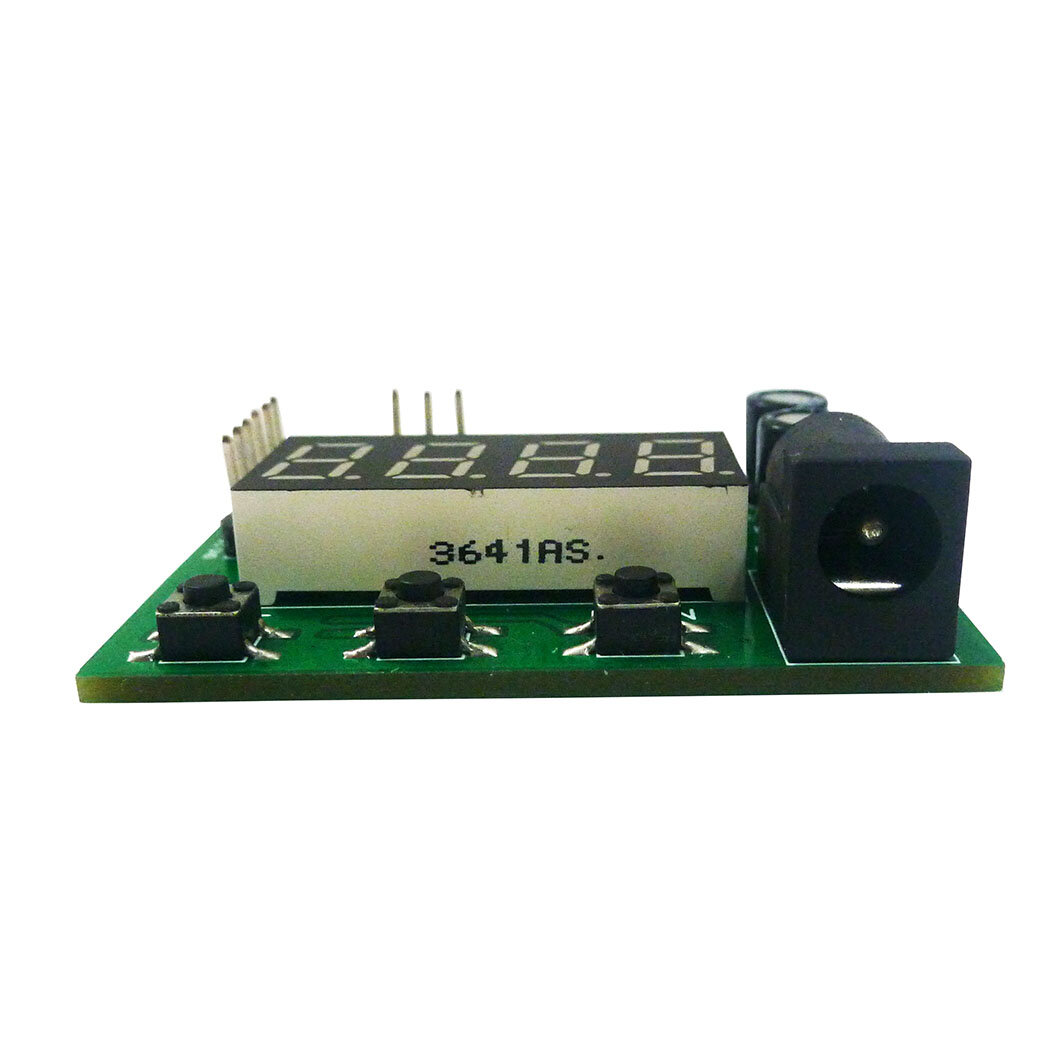
3 3 independent buttons: used to set frequency, duty cycle, working status, etc.;Support long press, short press, simple operation and diverse functions.
4 3 Channels PWM output: PWM Signal can set frequency and duty cycle respectively.
5 PWM signal level: 5V TTL level
6 PWM signal load capacity: <20mA
7 Output frequency accuracy: 0.6% (10-30 Degrees Celsius)
8 Ultra-high frequency range: 20HZ ~ 1MHZ, duty cycle 0-100%.
9. Power-off memory function: power off at any time, the last set data will be recorded and saved when power off, and the data will be displayed when power is turned on again.
10 Automatic exit function: If there is no operation for 36 seconds, the last set data will be automatically recorded, and the dynamic setting state will be exited.
11. Real-time update function: Under the dynamic setting function, you can connect an oscilloscope to grasp the set frequency and duty cycle at any time, and output the precise frequency or duty cycle.
12. Restore production setting function: in dynamic setting mode, press and hold the UP and DOWN buttons at the same time to restore the production setting (after pressing, you need to power off and power on again, the data will be updated to the default data)
13 kinds of application scenarios: The module has a variety of control methods and working modes, and three output channels, which can meet the requirements of different environments.
14 Dimensions: 49 x 38 x 13mm
15 Weight: 14.5g
PWM signal parameter description:
1 PWM frequency: the setting range is 20HZ ~ 1MHZ. The default value is 100HZ.
Four-digit digital tube, the decimal determines the unit of frequency. When there is a decimal point, the unit is KHZ, and when there is no decimal point, the unit is HZ.
The relationship between the digital tube display number and the output frequency:
0034: Indicates that the frequency is 34HZ
0234: Indicates the frequency is 234HZ
1234: Indicates the frequency is 1234HZ
1.234 : indicates that the frequency is 1.234KHZ
12.34 : indicates that the frequency is 12.34KHZ
123.4: Indicates the frequency is 123.4KHZ
0.123: Indicates that the frequency is 0.123KHZ (that is, 123HZ)
2 PWM duty cycle: setting range 0 ~ 100
0: The corresponding PWM remains low
100: The corresponding PWM remains high
1 ~ 99: corresponding duty cycle 0.01 ~ 0.99
The relationship between the digital tube display number and the output duty cycle
0005: Indicates that the output duty cycle is 0.05/5%
0050: Indicates that the output duty cycle is 0.50/50%
Note: 1. Other combinations are also possible, but whether the data can be more accurate is related to your test tool
Package include:
1u00d7 Module Board
How to set PWM output parameters:
Example 1:
For example, the parameters of the three channels are 100HZ/50%, 200HZ/60%, 300HZ/70%
View the parameters of the three channels:
1 Powered on PWM9B03 module, the PWR indicator is on, and the digital tube is off
2 Click the SET button to display PF1 (for 1 second), and then normally display 0100 (channel 1 frequency 100HZ)
3 Click the SET button twice to display dU1 (for 1 second), and then normally display 0050 (channel 1 duty cycle 50%)
4 Click the SET button three times to display PF2 (for 1 second), and then normally display 0200 (channel 2 frequency 200HZ)
5 Click the SET button four times, display dU2 (for 1 second), and then normally display 0060 (channel 2 duty cycle 60%)
6 Click the SET button five times to display PF3 (for 1 second), and then normally display 0300 (channel 3 frequency 300HZ)
7 Click the SET button six times, display dU3 (for 1 second), and then normally display 0070 (channel 3 duty cycle 70%)
Example 2:
Set channel 1 to: frequency 1000HZ, duty cycle 40%
1 Powered on PWM9B03 module , the PWR indicator is on, and the digital tube is off
2 Press and hold the SET button for 3-5 seconds, first display PF1 (for 1 second), and then flash the number
3 Click the UP/DOWN button to adjust the number to 1000 (frequency 1000HZ)
4 Press and hold the SET button for 3-5 seconds for the second time, first display dU1 (for 1 second), and then flash the number
5 Click the UP/DOWN button to adjust the number to 0040 (40% duty cycle)
6 Re-power
Example 3:
Set channel 3 to: frequency 10.12KHZ, duty cycle 60%
1 Powered on PWM9B03 module, the PWR indicator is on, and the digital tube is off
2 Press and hold the SET button for 3-5 seconds, first display PF1 (for 1 second), and then flash the number
3 Press and hold the SET button twice for 3-5 seconds, first display dU1 (for 1 second), and then flash the number
4 Press and hold the SET button three times for 3-5 seconds, PF2 will be displayed first (for 1 second), and then the number will flash.
5 Press and hold the SET button four times for 3-5 seconds, first display dU2 (for 1 second), and then flash the number
6 Press and hold the SET button five times for 3-5 seconds, first display PF3 (for 1 second), and then flash the number
7 Click the UP/DOWN button to adjust the number to 1012, and then click the SET button to adjust the number to 10.12 (frequency 10.12KHZ)
8 Press and hold the SET button for 3-5 seconds for six times, first display dU3 (for 1 second), and then flash the number
9 Click the UP/DOWN button to adjust the number to 0060 (60% duty cycle)
10 Re-power
Example 4:
Factory Reset
1 Powered on PWM9B03 module, the PWR indicator is on, and the digital tube is off
2 Press and hold the SET button for 3-5 seconds, first display PF1 (for 1 second), and then flash the number
3 Press the UP and DOWN buttons at the same time to restore the factory settings
4 Re-power


